
 Gaby
Gaby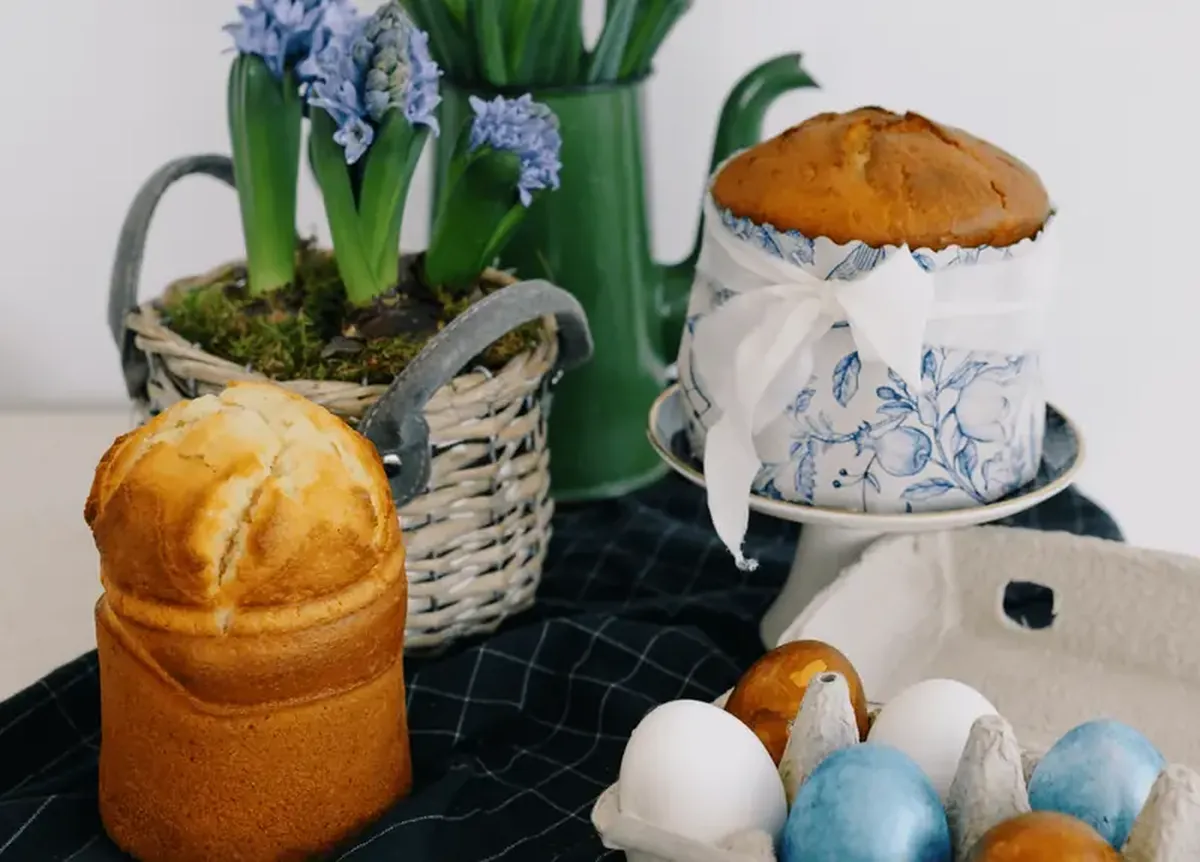
The first meal after Lent should include cheese- or flour-based Easter cakes and decorated eggs. Let’s get to work, home cooks!
Easter Cake Recipes
Homemade ceremonial baking for Easter can include gingerbread, cookies, or bunny-shaped cakes, but start with the queen of the festive table — the cheese cake — because it needs at least half a day to set.
The cheese Easter cake symbolizes the Tomb of Christ. It is made from rich dairy products: cheese and cream. To ensure the conical structure keeps its shape, press the cheese through a sieve. The special mold for this cake is called a “sachnitsa.” You can substitute a metal strainer or grater; the holes in the dish are necessary to drain the whey.
No-Bake Cheese Easter Cake with Condensed Milk
You will need 300 g of cheese, 200 g of boiled condensed milk, 100 g each of butter and sour cream, and fillers to taste (raisins, nuts, candied fruit, orange zest). Fans of fragrant spices can enhance the flavor with vanilla, cardamom, cinnamon, cloves, ginger, or nutmeg.
Chill this cake in the refrigerator for at least 8 hours before serving; you won’t need to bake it.
Take the butter out of the fridge in advance to soften. Blend it with the cheese, sour cream, and condensed milk using a blender, add the fillers, and pour the mixture into a sachnitsa lined with four layers of cheesecloth. Invert the mold and place a weight on top. This is a perfect choice for those who don’t want to work with dough and flour.

Custard Cheese Easter Cake
You will need 540 g of cheese, 100 g of cream, 100 g of soft butter, 3 egg yolks, 100 g of sugar, 10 g of vanilla sugar, and nuts or dried fruit to taste.
Using a mixer, beat the softened butter, yolks, sugar, and cheese into a smooth mixture. Transfer the mixture to a saucepan and heat it over low heat until bubbles form (do not boil). Once removed from the heat, add the vanilla sugar, place the saucepan in cold water, and cool the cheese mixture.
Add whipped cream, nuts toasted in a dry pan, and dried fruit to the mixture. Pour the mixture into an inverted, cheesecloth-lined sachnitsa. Press down with a weight and refrigerate for 10–12 hours, placing a bowl underneath to catch the whey. Drizzle the finished cake with melted chocolate or sprinkle with coconut flakes.
Classic Easter Cake Recipe
The hallmark of this recipe is preparing a sponge. The classic Easter cake is baked from yeast dough.
Ingredients: 500 g of wheat flour, 25 g of fresh yeast, 100 ml of warm milk, 200 g of sugar, 100 g each of butter and 25% sour cream, 2 eggs, 60 g of raisins, 70 g of cranberries or candied fruit, 3 tablespoons of vegetable oil, ½ teaspoon each of salt and turmeric.
Icing: 100 g of powdered sugar, ½ teaspoon each of gelatin and lemon juice.
Prepare the sponge. Dissolve the yeast in warm milk, add a spoonful of sugar, and mix. Stir in three tablespoons of flour. Let the mixture sit for 20 minutes until it reaches the consistency of sour cream.
Beat the eggs, sugar, salt, and vanilla until frothy. Add the sour cream, butter, and turmeric. Mix until uniform, combine with the yeast mixture, and mix again.
Add the liquid ingredients to the flour and mix until the flour is fully absorbed. Transfer the dough to a floured surface and knead by hand. Drizzle with vegetable oil and continue kneading. Place the dough in an oiled bowl, cover with plastic wrap, and let it rise in a warm place until it doubles in size.
Stretch the dough into a flat shape, add the fillers (raisins, candied fruit, cranberries, dried fruit), and knead again. Divide the dough into molds and let it rise until doubled. In total, the sponge should take about 40 minutes to rise. Do not leave it in a draft.
Bake the Easter cake in an oven at 180°C. Check for doneness with a toothpick: it should come out dry.
To decorate the cakes, dissolve a packet of gelatin in 1 tablespoon of water and let it swell. Mix 1 tablespoon of sugar with 2 tablespoons of water and lemon juice. Heat over low heat, stirring until it boils, then remove from the heat and use for decoration.

Easter Cakes with Candied Fruits
In this popular recipe, use candied berries and fruit instead of traditional raisins. For a rich flavor, don’t skimp on the fat content of dairy products: use 2.5% milk, 20% sour cream, and butter with 82.5% fat.
Ingredients: 800 g of wheat flour, 25 g of fresh yeast, 220 ml of warm milk, 100 g of soft butter, 2 tablespoons each of sour cream and oil, 1 egg (only the yolk), 225 g of sugar plus 1 tablespoon for the sponge, 200 g of powdered sugar, 10 g of vanilla sugar, 1 orange (juice and zest needed), 25 ml of strong alcohol (whiskey, vodka, rum, or cognac), 100 g of candied fruit, and a pinch of salt.
For the sponge, warm 220 ml of milk to about 30°C and dissolve the yeast and 1 tablespoon of sugar in it. Cover with plastic wrap or a towel and let it sit in a warm place for 20 minutes. When the sponge rises (it should double in size), add the egg yolk, sugar, vanilla sugar, salt, butter, and sour cream. Mix well, adding the juice of half the orange (the other half will be used for icing).
Add the flour and mix until homogeneous, optionally adding a quarter cup of strong alcohol to enhance the flavor. The cake acquires a delicate aroma and stays fresh longer with this addition.
Knead the dough for at least 10 minutes. When it stops sticking to your hands, form it into a ball and place it in a greased bowl. Cover and let it rise for an hour. When the dough doubles in size, reshape it into a ball. Wait another 40 minutes and then add the candied fruit, making sure the fruit pieces do not sit on the surface of the dough or they will burn during baking.
Fill the molds two-thirds full. In metal molds, line the bottom with parchment paper and grease both the bottom and sides with butter. When the dough rises to the edge of the molds, place the cakes in the oven. Set the oven to convection mode and preheat to 180°C. Bake for 25 minutes and cool completely before applying the icing (a mixture of orange juice and powdered sugar). You can also add decorative sprinkles to the icing.

DIY Easter Cake Decorations
Typically, Easter pastries are tall, round cakes topped with white icing and colorful sprinkles. You can also create unique decorations — for example, use a paper stencil cut in the shape of church domes with crosses.
Decorating with Cocoa Powder or Powdered Sugar
Start by icing the cake and brushing a thin sticky layer of liquid honey or simple syrup on top. Place the stencil over this “glue” and sprinkle cocoa powder, nut crumbs, or powdered sugar from the edges of the stencil. Remove the stencil to reveal a clear design with a sharp outline.
Glazing with Gelatin
This decoration won’t crumble because it has an elastic base.
Take 5 g of gelatin and 25 ml of water to dissolve it, 200 g of sugar, 50 ml of water for the syrup, and 1 tablespoon of lemon juice. Draw a willow branch on the white surface using melted chocolate.
Soak the gelatin and let it swell (about 20 minutes). Cook the sugar syrup, let it cool slightly, and combine it with the gelatin and lemon juice. Whip the cream with a mixer until it reaches medium thickness: the icing should not run off or harden too quickly. Once the cake is covered with a white “cap,” apply the willow-branch design using melted chocolate.
DIY Pysanky (Easter Eggs)
Decorating Easter eggs uses a dozen different techniques. The main holiday adornments can be painted, dyed, appliquéd, tattooed, cut out, or even embroidered. Pysanky is one of the most demanding techniques, requiring skill or artistic talent. Pysankars work with raw cold eggs or blown shells, applying patterns with hot wax using a special tool. The tool of the craftsperson is a brush or a “pysachok” — a wooden stick with a reservoir for melted wax.
After applying the first design, dip the egg in diluted dye: start with light colors and gradually increase saturation and contrast. After each dye bath, wipe the egg, apply the next element of the pattern with wax, and dip it in a darker dye. Once all layers have dried, place the pysanka in an oven (traditionally this was done in a stove) so the wax melts and drips off the surface of the egg. Geometric patterns and natural elements are common motifs; flora and fauna are among the most popular subjects.
Preparation for painting begins with making the pysachok. The tool is made from thin tin or foil: roll a conical tube around a needle with the smallest possible opening at the tip. Secure this cone with thin copper wire to a wooden stick.
You will need:
- pysachok,
- white eggs,
- candle,
- beeswax,
- matches,
- soft pencil,
- aniline dyes for fabrics or egg dyes,
- bleach,
- vinegar,
- towel,
- napkins,
- spoon.
Dyes should be diluted in hot water (0.5 l), strained, and 2 tablespoons of vinegar added. If the dye is light (yellow or orange), replace the vinegar with 1 teaspoon of salt. Wash raw eggs and dry them before painting.
Hold the egg balanced on your pinky and divide the surface with a pencil into several sections. Rotate the egg toward you and draw the line away from you to achieve steady strokes. To keep lines even, don’t change the pencil’s position in your hand. In the outlined sections, distribute the pysanka pattern.
Heat the pysachok over a lit candle so the wax melts; cover the parts of the shell that should remain white. In a spoon, dip the egg for a couple of minutes in warm — not hot — yellow dye (the wax should not melt at this stage). After drying the dyed egg with a napkin, apply wax to the yellow parts of the ornament. Dots of green (if present in the pattern) are applied with a match, dabbed with a napkin, and covered with wax. Then dip the egg in orange dye and repeat the process. Continue with red, brown, and black dyes.
To achieve a green background, first dip a red egg in clean water, then in yellow dye, and finally immerse it in green dye.
Hold the egg near the flame so the wax melts, wipe it with a cotton napkin, and rub the finished pysanka with lard for shine.
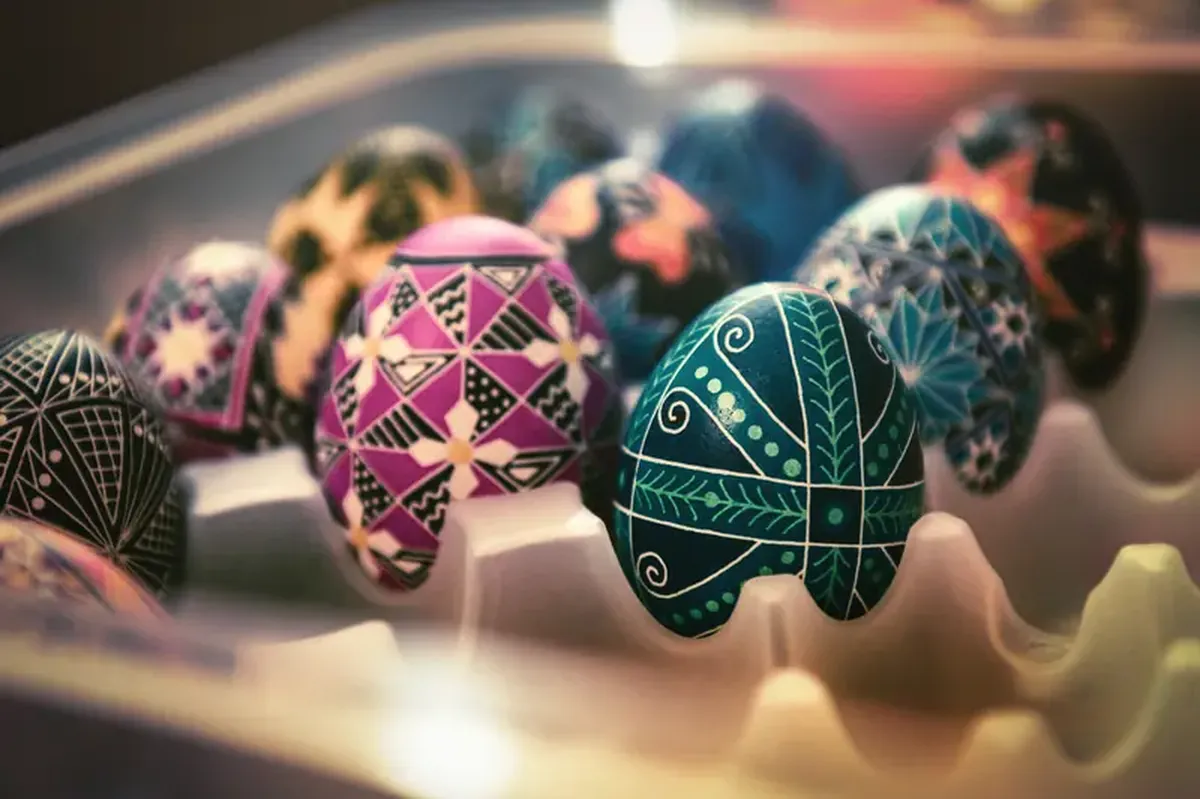
Dyed Eggs and Pysanky
The traditional technique for dyeing Easter eggs is the most accessible. If pysanky feels like “advanced level,” try other decoration methods. For dyed eggs, unlike pysanky, you don’t need a pysachok or wax. Although food dyes have been industrialized since the last century, home cooks are increasingly returning to “grandma’s” techniques. In the old days, eggs were simply boiled in natural dyes and left in broths made from onion skins, roots, bark, buds, stems, herbs, flowers, and fruit for natural toning.
Green eggs come from a broth of nettles and spinach. Brown dyes come from a decoction of walnut shells and partitions, black tea, or coffee. Turmeric yields yellow. Cranberry broth gives pink. Blue comes from hibiscus tea. Purple results from a brew of violet petals (pour boiling water over the flowers and place boiled eggs in it overnight). For a delicate lavender tone, add lemon juice to the infusion.
For a more interesting effect, place herbs (parsley, dill, nettle) or leaves (birch or oak) on the egg before dyeing. Put the egg in a stocking or wrap it in cheesecloth and tie it with thread. When you remove the “uniform,” the pattern on the shell will pleasantly surprise you.
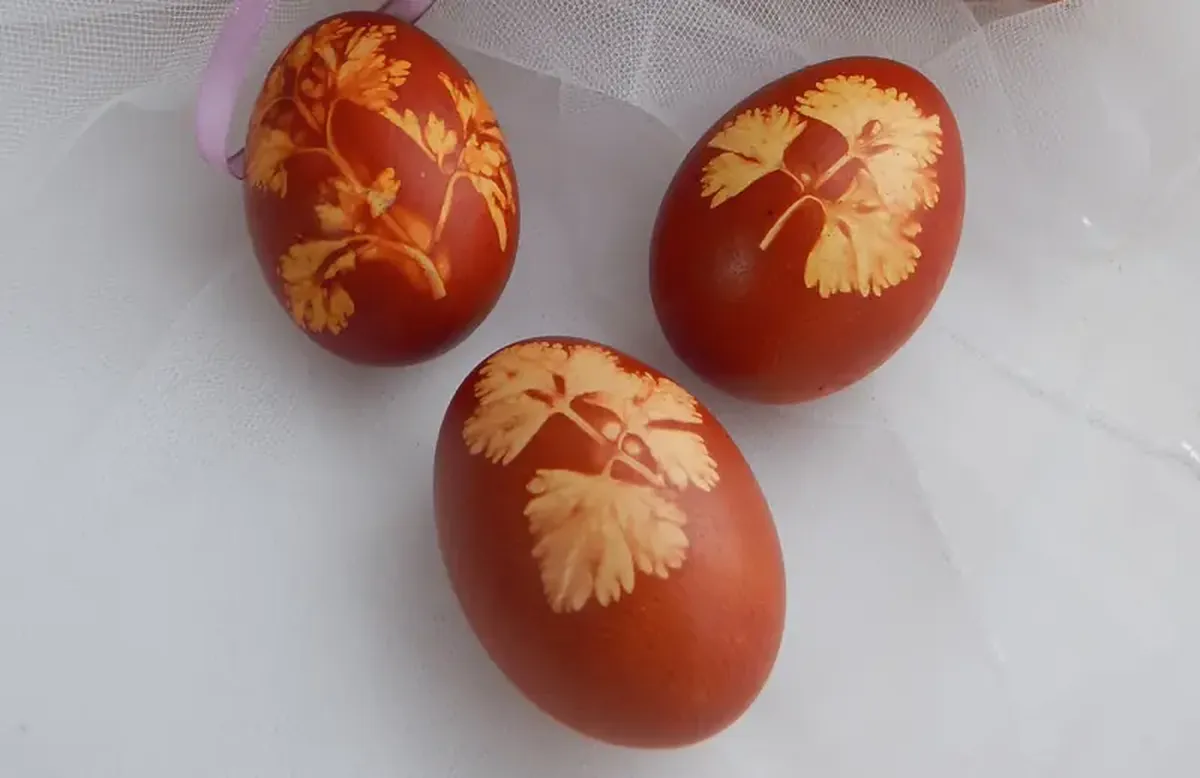
In addition to natural patterns, achieve geometric prints on dyed eggs by wrapping them with rubber bands. Make speckled eggs using various grains. Combine colors and techniques for more interesting effects.
The secret to even dyeing is to degrease the shell first: dip the egg for a minute in an acidic solution (2 tablespoons of vinegar per 1 liter of water). The intensity of the color depends on whether you placed the egg in the broth dry or wet. For a brighter color, moisten the shell beforehand.
You can decorate an egg partially: for example, glue millet grains on one side and buckwheat on the other, or leave one side of the shell untouched to keep part of it in its natural state.
DIY Dyed Eggs
A bonus for those who read the Easter hacks to the end: recipes for natural dyes.
Yellow
Eggs turn sunny yellow in a turmeric solution. In a liter of water, dissolve 3 tablespoons of turmeric, boil for 20 minutes, then add white-shelled eggs and cook them in the solution.
Pink
For a pink shade, prepare a beet broth. Grate the beet, cover it with 300 ml of water, and dissolve 2 tablespoons of vinegar in it. After boiling, simmer the beets on low heat for half an hour, strain the liquid into a bowl, and immerse freshly boiled eggs for 20 minutes.
Red
Pour two cups of onion skins with two liters of water and simmer for an hour over low heat. After straining, boil the eggs in the onion broth. Depending on the broth’s strength and how long the eggs sit in it, you’ll get colors from red to burgundy and from golden to brick. Eggs with darker shells will yield a more saturated color.
A second recipe for red tones is a cherry infusion. Pour water over cherry bark and branches (100 g per cup of water) and simmer for half an hour. If you leave the broth overnight, you will achieve a deeper color. Boil the eggs in the strained infusion.
Blue and Light Blue
Red cabbage produces blue shades. Cover chopped cabbage with 0.5 liters of water, add 5 tablespoons of vinegar, and let it sit overnight. In the morning, strain the infusion and place freshly boiled eggs in it. Let them stay in the infusion for at least half an hour.
Purple and Violet
Use frozen or fresh berries — currants, blueberries, or lingonberries — for purple tones. Pour 200 g of berries with a liter of water, boil for a few minutes, and strain. After steeping for 3–8 hours, place raw eggs in the broth and boil them for about 10 minutes.
Chocolate
Coffee gives eggs a brown color. Boil the eggs in a strong coffee infusion and leave them in it for half an hour.
Once the eggs dry, rub them with sunflower oil for shine. The oil penetrates micro-cracks, acting as a sealant and extending the shelf life of the dyed eggs.
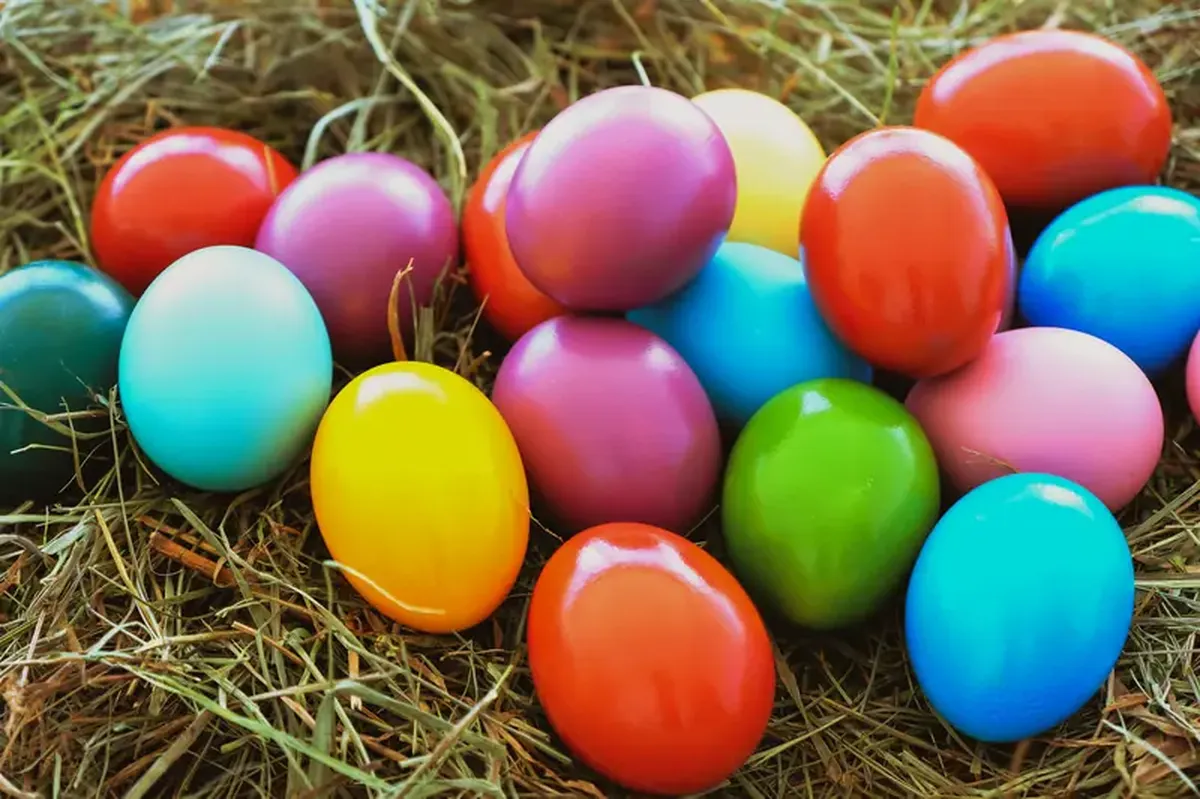
Pysanky can also be made with minimal effort: paint eggs using a regular brush and artistic paints. Start painting from the top of the egg, then flip it over and paint the bottom. Alternatively, cut out details from colored napkins and glue them onto the egg, then cover with a clear fixative — the picture will look just as good as if it were painted.